Friday, September 30, 2011

CHEESY BUTTERMILK BREAD STICKS

RECIPES THAT MAKE YOU FEEL ALL NOSTALGIC AND LONG FOR THE GOOD OLD DAYS WHEN THINGS WERE SIMPLE AND EASY.

Once in a while you need some kind of bread to go with a meal and you don't quite know what it is but you know you don't have time to run to the store and buy something and you don't have 3 hours to make yeast rolls. Here is the solution to your problem! These bread sticks are fast, easy and delicious. If you don't have the cheese or the buttermilk you can still make them; just leave out the cheese and use regular milk instead, but they are so much better with the cheese and buttermilk that it's worth waiting to make them until you have these two things on hand. On the other hand, they're so good that maybe it's better not to postpone making them until you have the cheese and buttermilk. Either way, you'll be glad you have these to go with your dinner and so will everyone else who is eating dinner with you when you make them. Of course, they'll want to know how you made them and all you have to say is, "Oh, it's just one of those recipes I happened upon and wanted to see if it was any good. I'm soooo glad you like them." They're good with just about anything, but especially good with chili. Here's how they're made:

1/3 c. butter

2 1/2 c. flour

2 tbsp. sugar

3 1/2 tsp. baking powder

3/4 C. grated cheddar cheese

1 1/2 tsp. salt

1 C. buttermilk


1. Sift together flour, sugar, baking powder and salt.


2. Add the buttermilk and cheese and stir with a fork until the dough clings. Add slightly more buttermilk if it is too crumbly.


3. Melt the butter in the preheated oven until it is completely melted. Take it out of the oven.

4. Roll the dough into a ball on a flat surface sprayed with Pam. Knead 10 times or until it is soft and pliable.


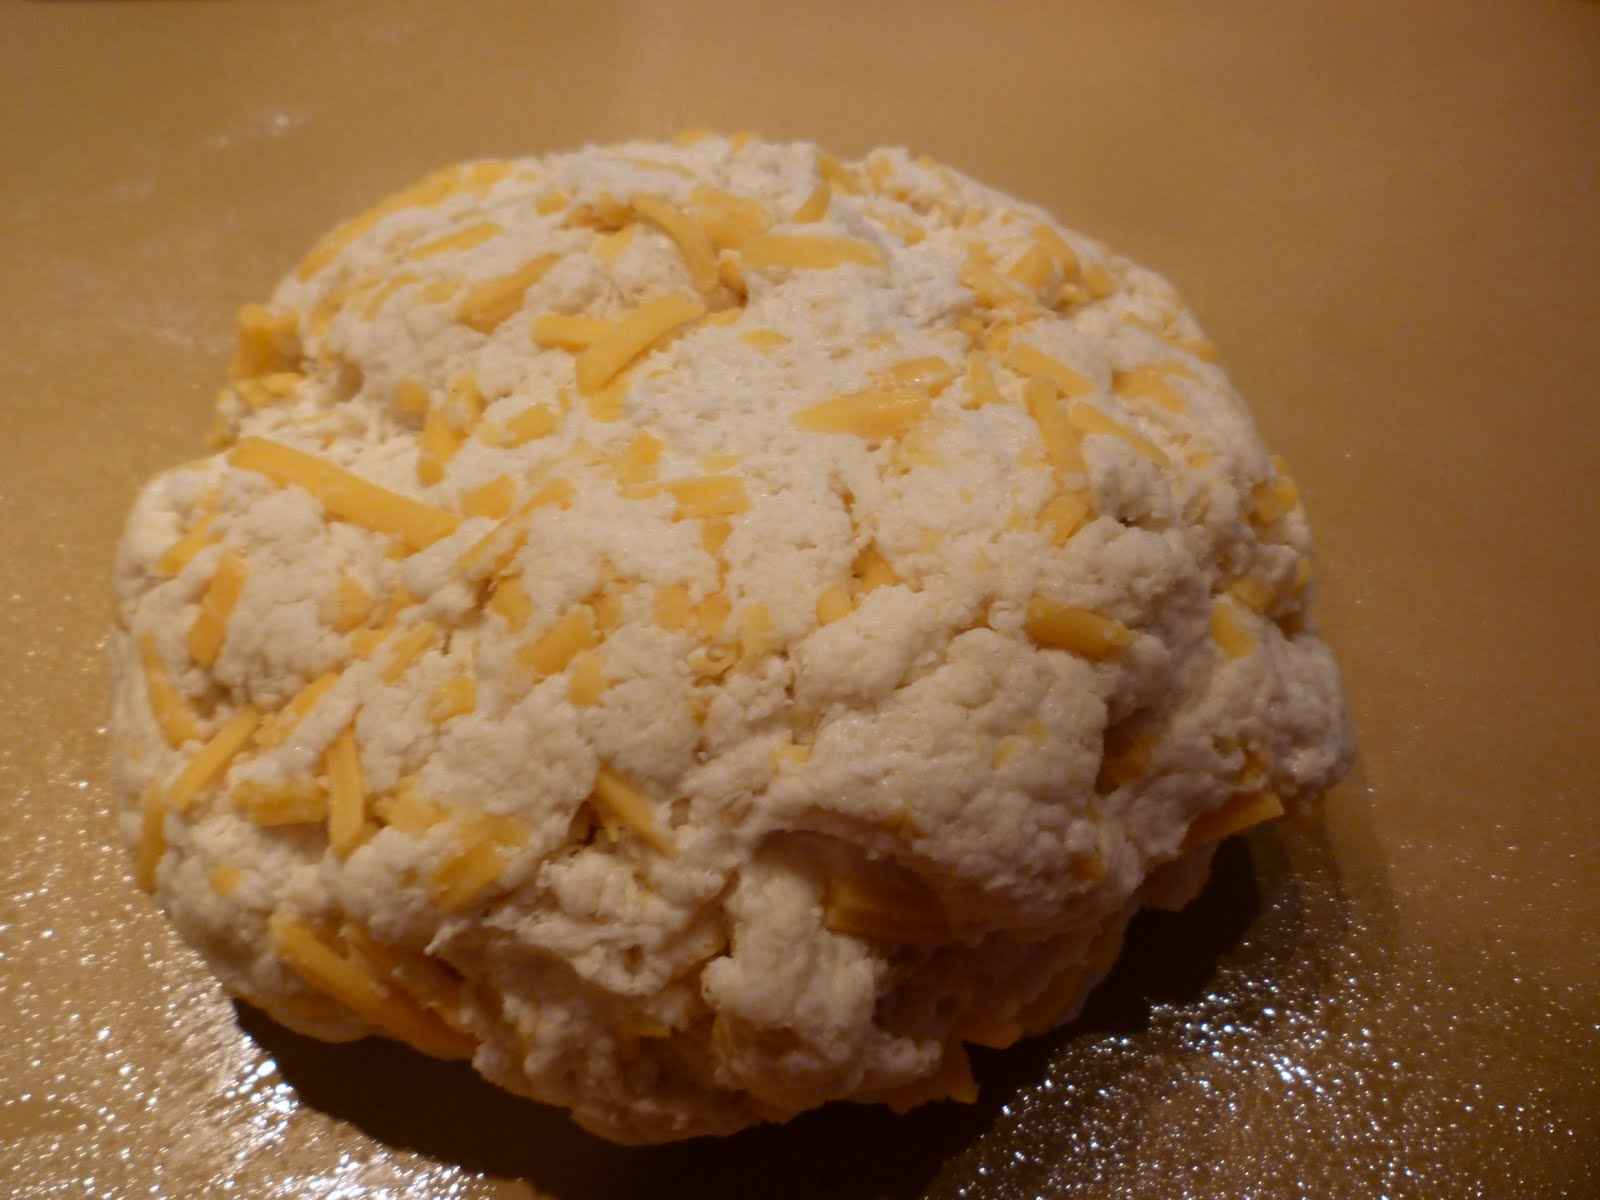
5. Roll the dough out into a rectangle about 1/2" thick.

6. Cut in half lengthwise and then into about 14 strips crosswise.

7. Dredge the sticks in the melted butter on both sides and place on the jelly roll pan not touching each other.

8. Bake in a 450 degree oven 10-12 minutes or until lightly browned. Serves 6-10. Enjoy!


Thursday, September 29, 2011

RAMEN BROCCOLI AND CHEESE CASSEROLE


RECIPES THAT MAKE YOU FEEL ALL NOSTALGIC AND LONG FOR THE GOOD OLD DAYS WHEN THINGS WERE SIMPLE AND EASY.

Just when you thought nobody could ever come up with something new to do with broccoli, along comes another recipe that will surprise you and change your mind if you happen to be one of those people who have never been able to come to terms with eating broccoli. This casserole isn't great, but it is good. It isn't exciting, but it is satisfying and best of all it really does taste good. You can use it as a side dish or you can even get away with it as a main dish if you have a few good sides to go along with it. If you are assigned to bring a hot dish to the next social gathering you go to, consider taking a broccoli casserole instead of the traditional chicken a la king or what have you. You can make it and freeze it and once you heat it up again, it will taste just as good as it did on the day when it came out of the oven the first time. Here's the recipe:

6 crowns of broccoli separated into small florets
1 C. mayonnaise
2 C. shredded cheddar cheese
2 eggs
1 can cream of mushroom soup (10 1/2 oz.)
1 pkg. Ramen soup


1. Wash the broccoli and get it ready to steam.

2. Separate the Ramen soup into small chunks and place in the bottom of a 10" X 10" baking dish spayed with Pam.

3. Combine the mayonnaise, soup, eggs, 1 1/2 C. of the cheese (reserving 1/2 C. for the topping) and the seasoning packet from the Ramen soup.

4. Steam the broccoli for 2 minutes or just long enough to keep it from being raw.

5. Mix the broccoli together with the sauce.

6. Spread in the baking dish on top of the Ramen noodles. Make sure it covers the noodles completely.
7. Bake in 350 degree oven for 30 minutes. Put the remaining 1/2 C. of cheese on top for the last 5 minutes while it is baking to melt the cheese.

7. That's it! Serve while it's hot. This amazingly good dish will make the grade when you put it on the table. One serving idea is to buy a roasted chicken from Costco or wherever you can buy one from. With that, some good bread and maybe a green salad, you have a terrific meal. Serves 4-6.. Enjoy!


Wednesday, September 28, 2011

PUMPKIN CHEESECAKE

RECIPES THAT MAKE YOU FEEL ALL NOSTALGIC AND LONG FOR THE GOOD OLD DAYS WHEN THINGS WERE SIMPLE AND EASY.


There is just something about cream cheese that makes absolutely everything taste better; it doesn't seem to matter what it is. . The combination of cream cheese and pumpkin, however, is one of the best that I've found so far. It almost seems as if they were made for each other and I like this recipe because you don't have to do any baking and it uses simple ingredients that you most likely already have around. Well, you may not have the cinnamon graham crackers, but just any old graham crackers will do. The only reason I have these particular graham crackers in the recipe is because I bought them by mistake the last time we made S'mores in the canyon and nobody liked them because they weren't "real" graham crackers, so I just saved them and used them for this recipe, instead, and I think they make it taste even better. But no, you don't HAVE to use them unless you want to. Regular graham crackers work just fine if that's all you happen to have. Otherwise, if you are going to the store to buy graham crackers just especially to use in this recipe, then be sure to buy the cinnamon kind. If you use regular graham crackers you will need to add 1/4 C. sugar to the crumbs. Okay, enough about the why's and wherefore's and on with the how.

3 packages cinnamon graham crackers, crushed
1/4 C. melted butter
1 8 oz. package softened cream cheese
1 1/2 C. sugar
1 small can pumpkin
2 tsp. cinnamon
1 tsp. nutmeg
1/2 tsp. cloves
2 8 oz. cartons Cool-Whip or 2 pints (1 qt) whipping cream, whipped
1 package cinnamon graham crackers, crushed (for the topping)


1. Put 2 of the graham cracker packages in a food processor and blend until they are fine crumbs. You can also use a blender or, if you are a purist, you can crush them on a bread board with a rolling pin. Whichever way works best for you.

2. Add the melted butter and mix well. Then put the crumbs into the bottom of a 9" X 13" oblong dish. Flatten with the bottom of a small measuring cup. Now put this in the freezer to set up.

3. Meanwhile, take the softened cream cheese, sugar and spices and mix well in your mixer. Make sure the cream cheese is well softened so you won't have any lumps. it works best if you do the cream cheese and sugar first and then add the spices and pumpkin last.

4. Stir the pumpkin and spices together first before adding to the cream cheese mixture.

5. You can soften the cream cheese in the microwave but don't try doing it in the package. Always remove it from the package first, put it into a bowl and then soften it on high for about 30-45 seconds. Or, leave it on the kitchen counter to soften at room temperature which takes about one hour after taking it from the fridge. Either way works fine.

6. Now place all of the above ingredients except for the cream and the third package of graham crackers into a large mixing bowl and beat on high for about one minute.

7. After it is well-mixed, whip the cream or take out the Cool-Whip and fold it (one 8 oz carton) gently into the pumpkin mixture.

8. Spread it evenly onto the crumb crust that has been hardened in the freezer. Return it to the freezer and let it set up, about one hour.

9. After it has had a chance to set up in the freezer, crush the third package of graham crackers. Spread the second carton of Cool-Whip on top, cover with graham cracker crumbs and serve. The nice thing about this dessert is that you can make it 1 or 2 days in advance, cover with foil and keep in the freezer until you are ready to serve it. It goes well with just about anything or can alone by itself, too.
Serves 10-12. Enjoy!


Tuesday, September 27, 2011

ORANGE TARRAGON CHICKEN DINNER


RECIPES THAT MAKE YOU FEEL ALL NOSTALGIC AND LONG FOR THE GOOD OLD DAYS WHEN THINGS WERE SIMPLE AND EASY.

Thank goodness for chicken when you need a good and easy dinner and you don't feel like standing over a hot stove or cooking something that takes all day long. Chicken is always welcome at the dinner table and besides, you can do so many different things with it. Everyone has their own favorite chicken recipe of which there must be thousands. Some people won't eat anything but the white meat of a chicken breast which is the way it happens to be at my house and which is why I usually don't use any other kind of chicken meat. This recipe would probably be just as good using thigh meat; I just don't usually buy it because no one around here will eat it. However, chicken meat aside, this is one of those dinners that you can fix when you don't want to think too much or go out on a limb and try something really exotic, but you'd like something a little different to brighten up your day and give you something to look forward to when all is said and done. so, on with the Orange Tarragon Chicken Dinner!

2 large chicken breasts
2 T. olive oil
1 tsp. seasoning salt
2 medium oranges
1 T. dried tarragon
2 T. corn starch
2 C. water
1 tsp. salt
1 C. rice

1. Pour the olive oil over the chicken breasts that have been placed in a heavy cooking pot.
2. Season the chicken with the seasoning salt.

3. Juice one of the oranges and pour the juice over the chicken. Sprinkle the tarragon over the chicken.

4. Cover the pot and cook at 250 degrees for one hour. While the chicken is baking, cook the rice in the water with 1 tsp. salt. Any kind of rice will do, but if you use brown rice, plan on taking at least one hour for it to steam. Brown rice always takes longer than white rice. Don't ask me why.

5. Now juice one half of the second orange. Pour it into a small bowl and add the cornstarch. Then add this to the juices left in the pot from the chicken and bring to a boil.

6. Cut the remaining 1/2 orange into thin slices. Cut the chicken breasts diagonally. Put the chicken over the rice on a serving platter. Place the orange pieces on top and pour the thickened juice over the top.

This has a very mild taste. The orange juice and tarragon are a wonderful combination. Plus, it will make you look like a real professional when you bring it to the table. Serves 2-3 people. Enjoy!


Monday, September 26, 2011

BANANA OATMEAL PECAN PANCAKES WITH VANILLA SYRUP

RECIPES THAT MAKE YOU FEEL ALL NOSTALGIC AND LONG FOR THE GOOD OLD DAYS WHEN THINGS WERE SIMPLE AND EASY.

Do you ever wake up in the morning and want something DIFFERENT for breakfast? Something to satisfy you when you're tired of the same old same old and you long for something that makes you feel all warm and fuzzy inside? I have good news for you--these pancakes will do all that and more. They are just what you need when you have a little extra time to do something fun for breakfast that will stay with you long after you've taken your last marvelous mouthful. Pancakes are great just as plain old pancakes, but once in a while you just need something more than just plain old pancakes and these pancakes are definitely something more. My mother used to call pancakes "hotcakes" which makes sense because they aren't really any good unless you eat them hot off the griddle. Pancakes are always fun to dress up with things like blueberries or chocolate chips or what have you, but for some reason the combination in these pancakes really goes beyond anything you've had before. They stand out as unique and different all on their own, but then they become spectacular with the buttermilk vanilla syrup. Yum!
So, try these on for size and see if you don't agree that this is one of the best pancakes you've ever eaten or I'll gladly eat my banana oatmeal pecan pancake.

1 1/2 C. oatmeal (the old fashioned kind)
1 C. flour
2 T. brown sugar
2 tsp. baking powder
1/2 tsp. salt
1 1/2 C. milk
1 C. mashed bananas
2 eggs, slightly beaten
2 T. melted butter
1/2 C. chopped pecans

1. Put the oatmeal into the blender and process until it is like coarse meal.

2. In a bowl combine the oatmeal flour, regular flour, brown sugar, baking powder and salt. In a separate bowl, whisk the milk, eggs, mashed banana and melted butter with a wire whisk until well-blended.

3. Chop up the pecans and set aside.

4. Combine the wet and dry ingredients and fold in the pecans. Heat a griddle and lightly grease or spray with Pam. It should be hot but not too hot. Hot enough to cook the pancakes, but not so hot that they are charred on the outside, but runny on the inside. If your batter is too thick, add a little more milk.

6. Cook on the griddle, flipping when the bubbles break.

7. They should look pretty much like this and, as Grandma Gee said, pancakes should always be eaten hot.

7. Meanwhile start making the vanilla syrup. Here's how:
In a medium saucepan put:
1 1/2 C. sugar
3/4 C. buttermilk
1/2 C. butter (one cube)
2 T. corn syrup
1 tsp. baking soda
2 tsp. vanilla

1. Mix the first 5 ingredients (all but the vanilla) and bring to a boil. Boil for 7 minutes.
2. Remove from the heat; stir in vanilla.
Serve on pancakes, waffles, etc.

3. Add some sliced fresh fruit and a dollop of whipped cream and you have some of the best pancakes you've ever eaten. Guaranteed! Enjoy.


Friday, September 23, 2011

BEEF BROCCOLI PINEAPPLE TERIYAKI STIR FRY


WEEK SIXTEEN: RECIPES THAT BRING OUT THE HOMEBODY IN YOU AND MAKE YOU GLAD THAT YOU LOVE TO EAT.

Everyone loves a good Teriyaki dish and this one has lots to love. First of all, since you don't really have to cook the meat, it is a time-saver and in addition, it is about one of the best Teriyaki dishes I've eaten in a long time. The trick is to have a big bag of frozen meatballs on hand because they are the secret ingredient here that gives this a lot of flavor. Everything else is good but not great, but when combined with the meatballs, Wow! That's all I can say.
You probably won't see this on the menu when you go out to a Asian restaurant but that's only because they don't usually use Italian meatballs in their stir fry. Not to worry, though, because it doesn't really taste Italian once you get all the other stuff in with it. If anyone complains, just tell them it's the way your grandmother used to make it and no one can argue with that! Since you cut the meatballs in half it lessens their resemblance to meatballs so you tend not to make the Italian connection, anyway.
I do need to say something about the wine. No, this isn't cooking wine, it's the real thing but not to worry--it's going to be okay because any alcohol will cook out whilst you're stirring your stir-fry. The reason for the real wine rather than cooking wine is that it contains much less sodium in it and the soy sauce adds plenty of sodium on its own.(In fact, I would recommend using the low-sodium kind if you happen to have it on hand.) I don't want to be responsible for driving anyone to drink so I hope you'll avoid taking any swings on the side. Now that that's cleared up, on with the Teriyaki!

2-3 C. frozen meatballs cut in half (depending on how meaty you want it to be)
1 small can pineapple tidbits
1 crown of fresh broccoli in small florets
1 can sliced mushrooms
1 medium onion, cut into small slices
2 T. oil
Juice from the canned pineapple
1/2 C. white wine
1/4 C. soy sauce
4 T. brown sugar (very important)
1 T. cornstarch
1 C. white rice
2 C. salted water

1. Cut up the onion and sautee it and the mushrooms in the oil.

2. Steam the broccoli florets for just 3-4 minutes. Make sure you don't steam it for too long. It needs to be bright green.

3. Combine the broccoli and the drained pineapple with the mushrooms and onion in your skillet. Add the meatballs cut in half.

4. Make the sauce with the pineapple juice, wine, soy sauce, brown sugar and cornstarch. Add to the beef and vegetables and bring to a boil. Cook just long enough for the sauce to thicken.

5. In the meantime cook the rice however you like your rice to be cooked--either steamed or made in a rice cooker. Pour the hot teriyaki over the rice and serve with your choice of side dish. This recipe serves 3-4. Enjoy!