Monday, October 31, 2011

YUMMY POTATO VEGETABLE CASSEROLE

RECIPES THAT DON’T REQUIRE YOU TO THINK TOO MUCH, PLAN AHEAD OR DO ANYTHING TOO HARD OR TOO SCARY.

This is one of those easy peasy recipes that you can fall back on whenever you need something that works for everyone and doesn't take too much time or effort to put together. You can make it three different ways: (1) using regular potatoes that you peel, cut up and boil just as you would for normal mashed potatoes or (2) using instant potatoes that are easy to make and taste almost as good, but not quite and (3) using baked potatoes that you happen to have on hand because you made extras the last time you baked potatoes which is what I did in this recipe. I love having extra baked potatoes around because you can do so many different things with them and this recipe is just one of the many. Also, this recipe can be used as a meatless main dish or as a nifty side dish that kills two birds with one stone--the vegetable and the potato part of the meal. If you have ever eaten at Tucano's Brazilian restaurant you know how wonderful their mashed potatoes with melted cheese on top is, and this potato recipe is very similar to that. I guarantee that you will love it and so will your family.

1. First you take 3-4 large potatoes, cut them up and boil them until they are very soft.

2. Next you steam 4 cups of fresh vegetables for 3 minutes. I used broccoli, peas, carrots, beans and corn. You can use any combination that your family likes either fresh or frozen.

3. When the potatoes are cooked you mash them until most if not all of the lumps are gone.
Then you add:
3 oz. cream cheese
1/4 C. sour cream
1/4 C. melted butter
1 T. dry chives
2 tsp. garlic powder
1 tsp. salt

Mash all of this together with the potatoes. Then put them into a greased or sprayed oven-proof casserole dish.

4. Make a hole in the center and add the steamed vegetables.

5. Cover the entire dish with grated cheddar cheese.

6. Cover the dish with aluminum foil that has been sprayed on the under side with Pam so the cheese won't stick to it.

7. Bake in a 350 degree oven for 20-30 minutes or until it is hot clear through and the cheese has had a chance to melt and it is bubbling hot. There you have it! Serve immediately. Serves 4-6. Enjoy!


SPOOKY HALLOWEEN CHOCOLATE PEANUT BUTTER CANDY


RECIPES THAT DON’T REQUIRE YOU TO THINK TOO MUCH, PLAN AHEAD OR DO ANYTHING TOO HARD OR TOO SCARY.

Just in case you haven't had enough candy or chocolate or something totally rich, fattening and utterly delicious, here is a recipe that you must try even if you only make it once a year or even once in a lifetime. It comes with no guarantees that it won't clog up your arteries, only that it is one of the best and easiest candies you will ever make and it will brighten up your Halloween night considerably even if you only eat just one. In fact, one is all you need to eat and probably all you should eat of these sinfully rich but amazingly wonderful little morsels. They come with no strings attached and they don't make any wild and unbelievable promises. They simply are what they are--good old chocolate peanut butter marshmallow whatchamacallits. Life just doesn't get any better than this so go ahead, indulge yourself just this once. You might regret it, but you won't forget it. Here's the recipe:

1. In a spacepan over medium-low heat or in the microwave on half power, melt together the following:

1/4 C. butter (1/2 cube)
1/2 C. peanut butter
1 -1/2 C. semi-sweet chocolate chips

2. After it has melted satisfactorily, add 3/4 package of miniature marshmallows. Then stir in 1 tsp. vanilla

3. Prepare little paper candy cups by putting them on a tray and get ready to fill them.

4. Put the melted candy into a pourable cup and fill each of the paper candy cups.

5. They will look like this. Now put them into the refrigerator or freezer to get them to set up.
Decorate any way you like--the cuter, the better. Serve only to your very favorite or most important guests. Makes approximately 24 candy cups. Enjoy!


Friday, October 28, 2011

QUICK AS A WINK VEGETABLE BEEF SOUP

WEEK TWENTY: RECIPES THAT WILL EVEN IMPRESS YOUR FUSS-BUDGET MOTHER-IN-LAW WHO HAS NEVER BEEN IMPRESSED WITH YOUR COOKING BEFORE.

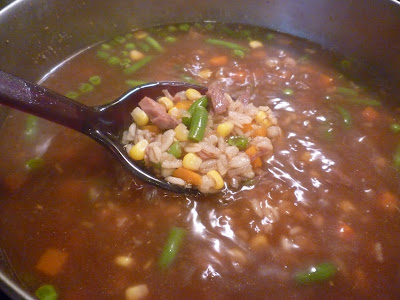
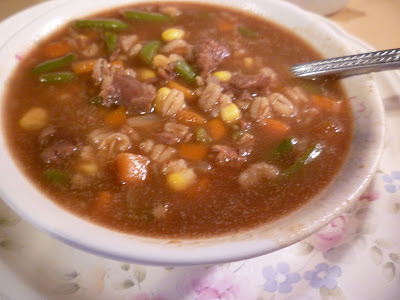
Making homemade soup used to be the world's biggest chore. You would have to cook the meat, peel and chop up the vegetables and cook them for a long time to get them soft enough to chew and so on and so on. It all seemed so overwhelming that it was much easier just to open a can and let it go at that. Well, let not your heart be troubled; making a big pot of delicious homemade soup--enough to feed the whole family plus a few extras--just got as easy as falling off a log or a stove or whatever you happens to be around. Everyone has a favorite way of doing things and my favorite is to put everything in a pot. let it cook all by itself and then when all is said and done, have something wonderful to eat that took almost no effort on my part but can make me look like I slaved all day on it. This soup recipe meets this criteria like a charm and will stand up to even the fussiest fuss budget eater unless they have a huge aversion to beef or vegetables or barley or whatever. This is one recipe you will fall back on time and time again whenever you need something good that you can make in a hurry and that makes a lot. The trick is to have everything on hand that you need so that throwing it together is like magic--now don't see it, now you do! So let's get started:

1. First you will need a large pan of water, about two quarts will do it. Add 1 tsp of salt but that's all.
2. To this add 1/2 C. quick barley. Make sure it's the 'quick' kind. Otherwise it will take much longer to make and you'll be frustrated and unhappy and wish you had made something else for dinner.

3. Next add a 1 lb. package of frozen vegetables. My favorite is Bird's Eye mixed vegetables that has beans, corn, peas and carrots. To me this seems to be the perfect combination for soup.

4. Next add 1/2 C. dry onion flakes, 2 packages of Au Jus mix and 1 can of roast beef chunks. (Yes, you really can buy roast beef all cooked for you. It is the secret ingredient in this recipe and it works wonderfully well. This can is from Costco, but I'm sure you can buy it other places, as well.)

5. Now bring it all to a boil, then cover it and let it simmer long enough to cook the barley and the vegetables, about 10-15 minutes.

6. After everything has had a chance to cook, add 1/2 C. McCormick Brown Gravy Mix to thicken it up and make it taste good. If you want, you can also add 2 T. butter for flavor, but this is purely optional. There you have it! Now, wasn't that easy? And aren't you glad you tried it? Of course you are! Serves 6-8. Enjoy!


Wednesday, October 26, 2011

BANANA BREAD FOR EVERYONE

WEEK TWENTY: RECIPES THAT WILL EVEN IMPRESS YOUR FUSS-BUDGET MOTHER-IN-LAW WHO HAS NEVER BEEN IMPRESSED WITH YOUR COOKING BEFORE.

I hate to think about how many overripe bananas I have thrown away in times past just because I didn't know what to do with them or didn't want to take the trouble to use them. But making banana bread is so easy and so worthwhile when you think that you're using something up rather than throwing it out where it's no good to anyone. Banana bread is nature's reward for being frugal and conservative and not letting a brown or almost black banana find itself in the trash. On top of it all, this wonderful, moist, spicy, aromatic bread is delicious to eat. You can make it with or without nuts and with or without the chocolate chips. It's good whichever way you make it. It's simple, down to earth and everything you want in a quick bread straight from the oven. You don't have to wait for it to cool to slice it and eat it as you usually do with a loaf of yeast bread. You can eat it hot enough to melt the butter right on it (if you like to butter your banana bread.) Here's how to do it:

Recipe:
3 ripe bananas
4 eggs
1 C. oil
1 tsp. vanilla
3 1/2 C. flour
1 1/2 C. white sugar
1 1/2 C. brown sugar
2 tsp. baking powder
2 tsp. baking soda
1 1/2 tsp. salt
1 tsp. cinnamon
1 tsp. nutmeg
1/4 tsp. each ground ginger and cloves
2/3 C. water
1/2 C. chopped walnuts (optional)
1 C. miniature chocolate chips (also optional)

Directions:
Mash the bananas in a deep bowl. Add the eggs, oil and vanilla and mix together with wire whip.

Put all the dry ingredients in a large bowl (your mix master bowl if you have one)

Gradually add the egg and banana mixture to the dry ingredients. The batter will be very thick. Then slowly pour in the water and keep mixing on medium speed for 2-3 minutes or until it becomes fluffy and light. Fold in the nuts and chocolate chips.

Pour the batter into 2 loaf pans and bake in a 350 degree oven for approximately 45 minutes or until they spring back on the top when touched. Makes 2 loaves of moist, delicious banana bread. You can also make muffins with this recipe.

Here is the bowl of mashed bananas, eggs and oil.

Combine all of the dry ingredients together in a big bowl.

Make sure you get rid of the brown sugar bumps.

Add the banana mixture to the dry ingredients very slowly. Then add the water. Beat on medium high speed for 2-3 minutes. After that you can put in the nuts or chocolate chips or whatever you want or don't want. I love nuts so I added them in. If you're not a nutter, then leave them out.


Pour the batter into 3 small or 2 large loaf pans that have been greased or sprayed with Pam Baking spray. Fill the pans 2/3 full. If you decide to make muffins, this recipe makes approximately 24. Yummm. Enjoy!


DINNER IN A PUMPKIN

WEEK TWENTY: RECIPES THAT WILL EVEN IMPRESS YOUR FUSS-BUDGET MOTHER-IN-LAW WHO HAS NEVER BEEN IMPRESSED WITH YOUR COOKING BEFORE.

This is something I've always wanted to try because I've heard how much fun it is and I know there are lots of families out there who have this as one of their time-honored tried and true family traditions at Halloween. Now that I have actually done it, I did learn a few things and would do it a bit differently next time but it turned out great and I'm glad I took the plunge and served it for dinner last night.
I would say on a scale of one to ten this is about a seven. It would be a ten if everything had cooked more thoroughly inside the pumpkin, so it does take a lot more time than I gave it which was two and a half hours. Also, it makes a lot so plan on having someone over for dinner if you decide to make it. But the flavor was good and I think the combinations were about right. Of course, you can experiment on your own and make it any way you want. You could even put spaghetti and meat balls inside the pumpkin and have it be brains and eyeballs for the little spooks in your house. Get as creative as you have the time and the inclination to be. Here is how I did it:

1. Take a nice round pumpkin, just the regular kind, wash it good and cut out the top. Scoop out all of the insides and wipe it down.

2. Put 10 cups of already cooked rice (I used brown rice but any rice will do) in a large bowl. Every recipe I read said that uncooked rice just doesn't cook inside the pumpkin and I can believe it because even with cooked rice some of the vegetables weren't quite cooked.

3. Chop up 1/2 head of cabbage.

4. Peel and chop a large onion and add to the cabbage. To this add 1 lb. browned hamburger.
Season with 1 T. Italian seasoning, salt and pepper.


5. Add 1 can spaghetti sauce, 1 can crushed tomatoes and 1 can Chili beans (optional).

6. Mix it all together (it looks awful, but that doesn't mean anything) and stuff it inside the pumpkin. If you have any left over, put it in a casserole dish and bake with the pumpkin.

7. Put the pumpkin on a cookie sheet lined with aluminum foil. It does make quite a mess.

8. You can cut a face into the pumpkin to make it more fun. It does ooze a little out of the holes, but that is part of the charm.

9. Now bake the pumpkin for at least 2-3 hours in a 350 degree oven depending on the size and how full you fill it. Here is how it looks when it's ready to serve. We added some grated yellow cheddar cheese to go on top of each serving and it was good. Serves 5-6 generously. Enjoy!


Tuesday, October 25, 2011

GRANDMA GEE'S DANISH EBELSKIVERS


WEEK TWENTY: RECIPES THAT WILL EVEN IMPRESS YOUR FUSS-BUDGET MOTHER-IN-LAW WHO HAS NEVER BEEN IMPRESSED WITH YOUR COOKING BEFORE.

This is one of those recipes that I simply couldn't leave out because it brings me such a feeling of nostalgia for those childhood days when my mother would get out her ebelskiver pan and whip up a big batch of these lovely and delicious treats. Her Danish heritage was the genesis of these wonderful, round little puffs of heaven and when she made them, we (my sister and I) really thought we were in heaven or at least a part of it. She was an expert at flipping them over and I would stand by the stove, watching her in awe and amazement as each little ball came out round and perfectly formed. She almost always made them on Christmas day as well as on special days like birthdays and such. I remember begging her on rainy days to make them so that we could devour an entire pile of ebelskivers before the rain stopped and then we would run outside and play. There is nothing like a batch of ebelskivers to take the clouds away and make you feel like, whatever the problems you're facing right now, they can wait until you finish off the last one.

Recipe:
2 C. flour
1/4 C. sugar
2 tsp. baking soda
1 tsp. Cardamon spice - very important
1 T. melted butter
4 Eggs separated
2 C. milk
1 tsp. vinegar
Butter or oil for pan

Sift together first 2 ingredients and set aside.
Add vinegar to milk (this sours the milk) then add butter and egg yolks.
Make a well in the center of the dry ingredients. Add the liquid mixture all at one time, stirring until well blended.
In a separate bowl beat the egg whites until rounded peaks are formed. Gently spread batter over egg whites and gently fold together.
Heat an ebelskiver pan over low heat. Test the pan for readiness by dropping a few drops of cold water. If drops dance around in small beads, the temperature is right.
Grease each well of the pan well with oil or butter (about 1/2 tsp. per well).
Pour the batter into wells, filling about 3/4 full. Using a skewer or knitting needle quickly flip the ebelskivers to form a ball. Don't get discouraged if it takes a while to learn how to flip.
When finished, roll them in powdered or granulated sugar and cinnamon or cover with syrup. Or, even better, fill them with jam and put a dollop of whipped cream on top. Wonderful!

Here is the cardamon spice. I didn't have any in my cupboard so I decided, since the recipe said that it's important, that I would buy some. I had no idea how expensive it would be! It must be shipped directly from the West Indies on a Lear jet. So, if you don't have any, you can borrow some of mine.

Here are the dry ingredients ready to be sifted together.

The liquids including the sour milk, butter and egg yolks.

Here are the lovely egg whites ready to be folded into the batter. I tried it both ways, just putting whole eggs into the batter and whipping up the whites separately. The latter is definitely better and makes the ebelskivers puff up beautifully while giving them a lighter taste.

It is easier to put the batter into a measuring cup to pour into the ebelskiver pan. This makes less mess and enables you to put the exact amount you need.

Here is my ebelskiver pan. I bought it at Target for $10 one day when I was there shopping for something else entirely different. It was definitely an impulse buy, but I had to have it when I saw it because it immediately took me back to my happy childhood days. I wish I knew what happened to my mother's ebelskiver pan. Hers was much bigger and heavier. She could make a dozen at a time.

The recipe says to use oil or butter in the wells, but you can spray them with Pam and they will come out just the same, but without the rich buttery taste. You can decide how you want to do it. Don't fill the wells too full or you will have trouble turning them over. My mother used a knitting needle but I used a wooden pick. It worked just fine.


This is how they look when you turn them over. Could anything be more fun? Your kids will love these!

They have to be eaten warm which is when they are at the height of deliciousness. You can even get inventive and put a fresh strawberry inside or even some chocolate. The sky is the limit when it comes to ebelskivers. This recipe makes about 2 dozen. Enjoy
!